How To: The Key to Backside 180s | Words: Brandon Judd | Photos: Bill Doster
Wait for It …
It’s just a 180, so it should be easy, right? In theory, sure. You’re not really spinning that much, so it should be relatively achievable — but you could say the same thing about switch riding too, right? It’s just a wake jump, so why is it so hard to do switchstance? It all comes down to your comfort level in all of your takeoff and landing positions. So if you can’t ride switch, and you’re asking yourself why you can’t land a backside 180, then we’ve already diagnosed your problem.
Overcoming this switch-riding barrier is directly connected to the time you spend riding switch. Do not procrastinate on this. The longer you put off switch riding, the more frustrating it is going to be to revisit it down the road. Start out small and make sure you do a few things switch every set without exception — even if it’s just a few slow carves. Eventually, your muscle memory will take over, and the day will come when you will get so comfortable that you forget you’re even riding switch.
Now let’s talk about how these 180s fit into the big picture — but first, pop quiz: How many different 180s exist in wakeboarding? Answer: a whopping 16! More than you thought, huh? Let’s break that number down: There are two different approach edges, heelside and toeside. And there are two different rotation directions, frontside and backside. Combine the two approach edges with the two spinning directions, and we’re up to four different 180s so far. Do all of those switch, and we’ve doubled our number to eight. Then do all of those off-axis, and you’ve doubled your number again to 16! It’s overwhelming, we know — but don’t worry, we’ve got you covered.
Since you’ve probably already dialed in most of your frontside 180s, let’s get you started on your on-axis backside 180s. Fortunately for you, we’ve got some drills up our sleeve that will help you break this barrier without all the violent back edges — and once your backside 180s are solid, we’ll get you grabbing them too.
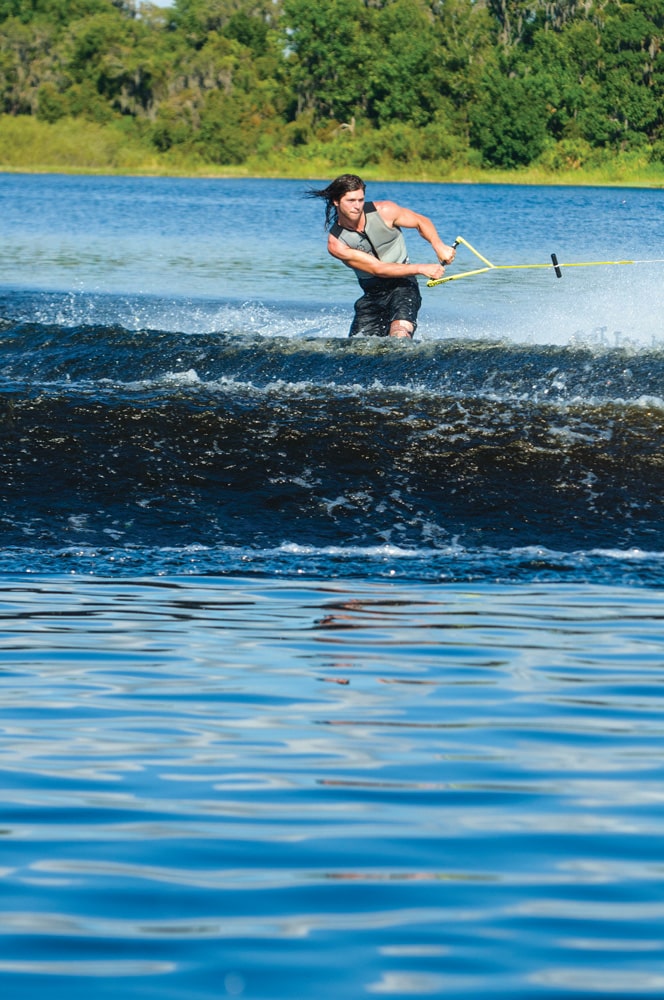
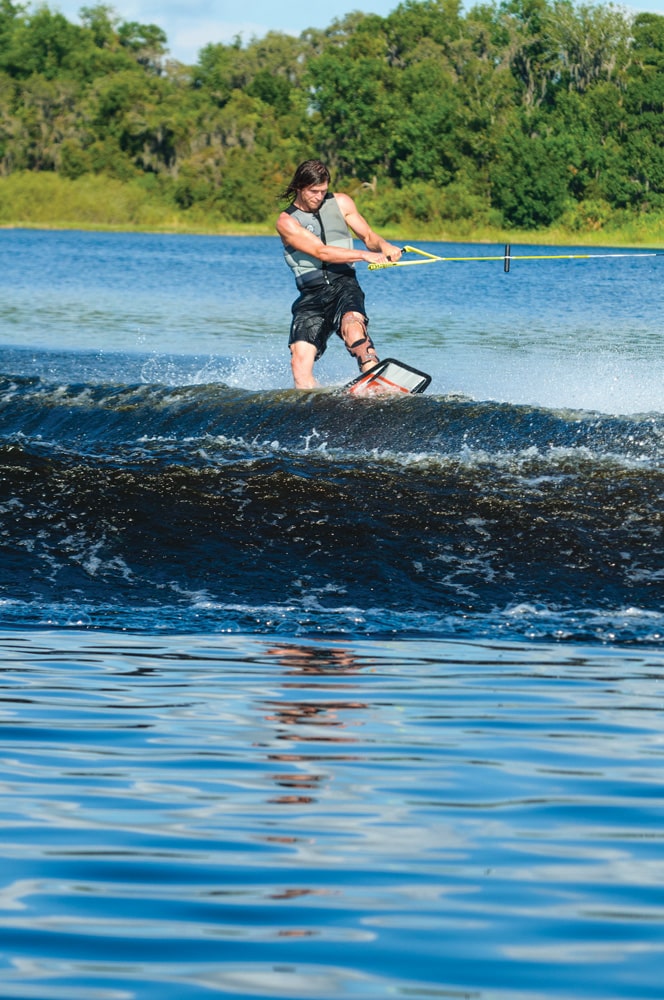
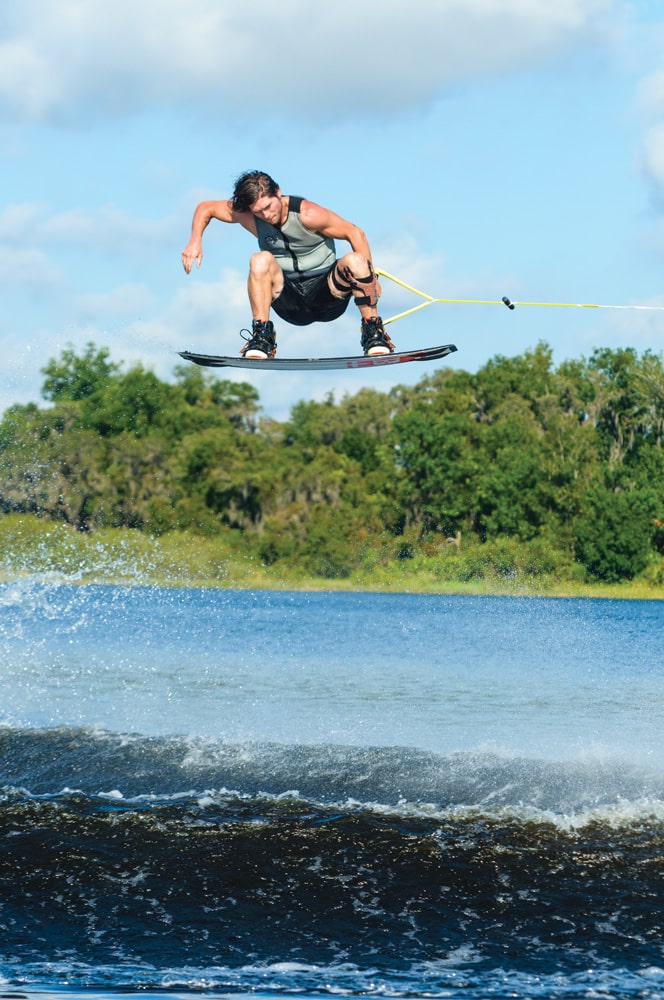
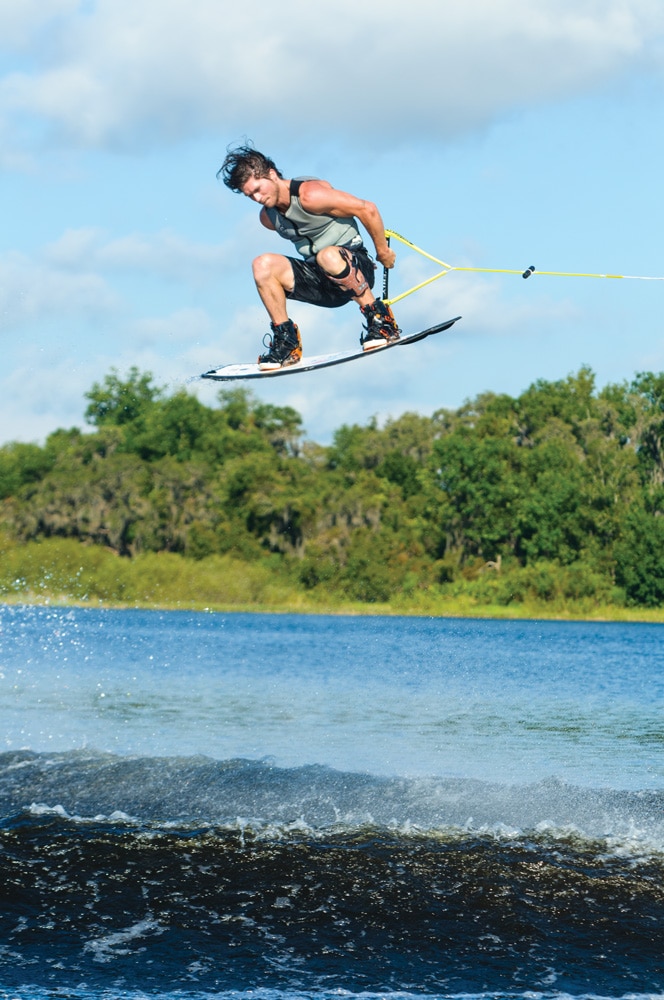
Heelside Backside 180s
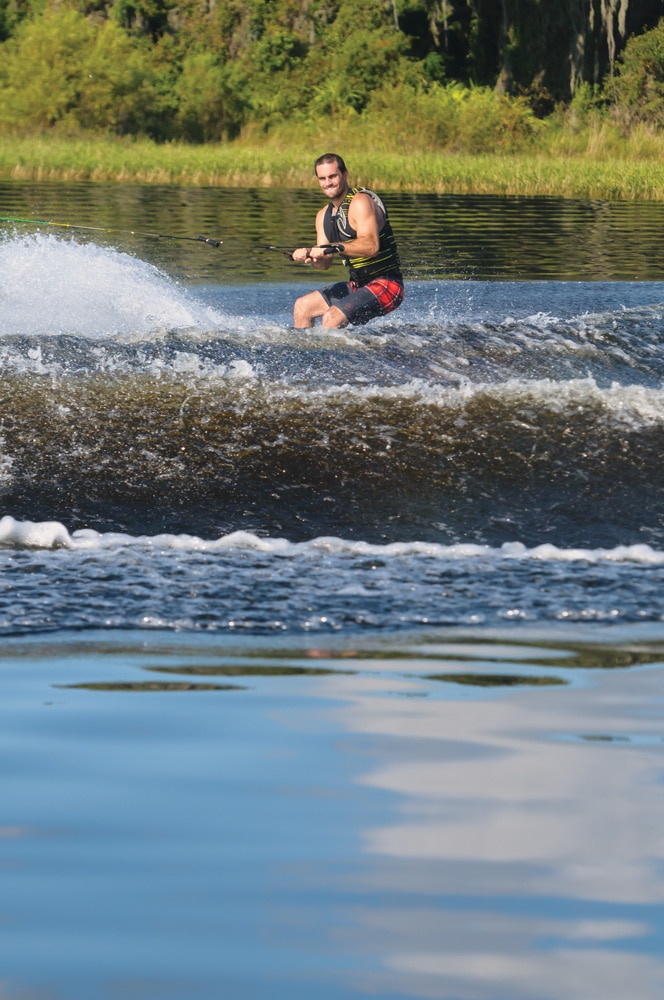
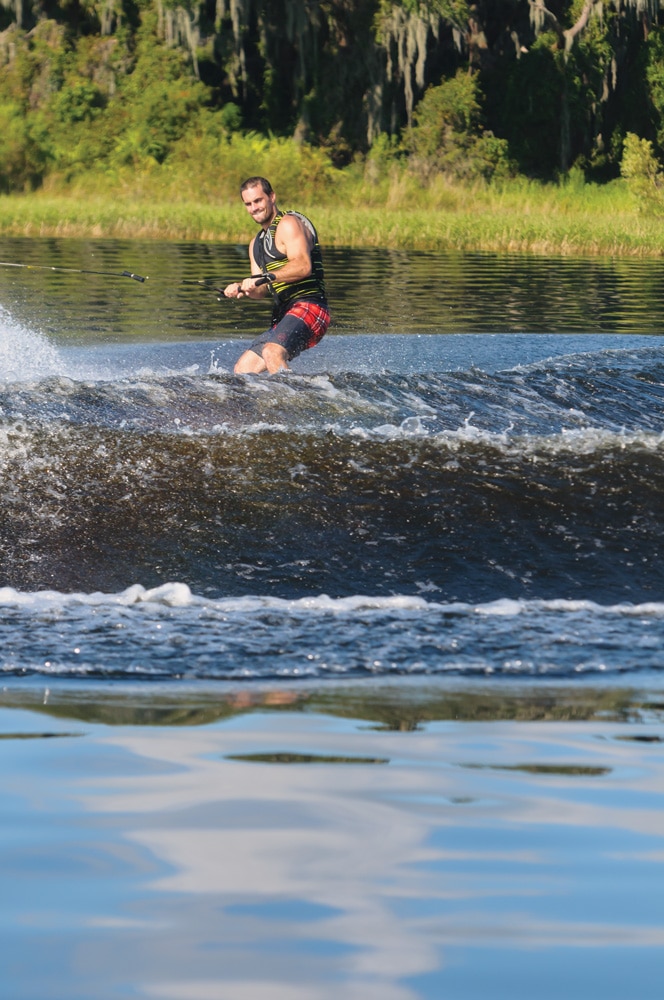
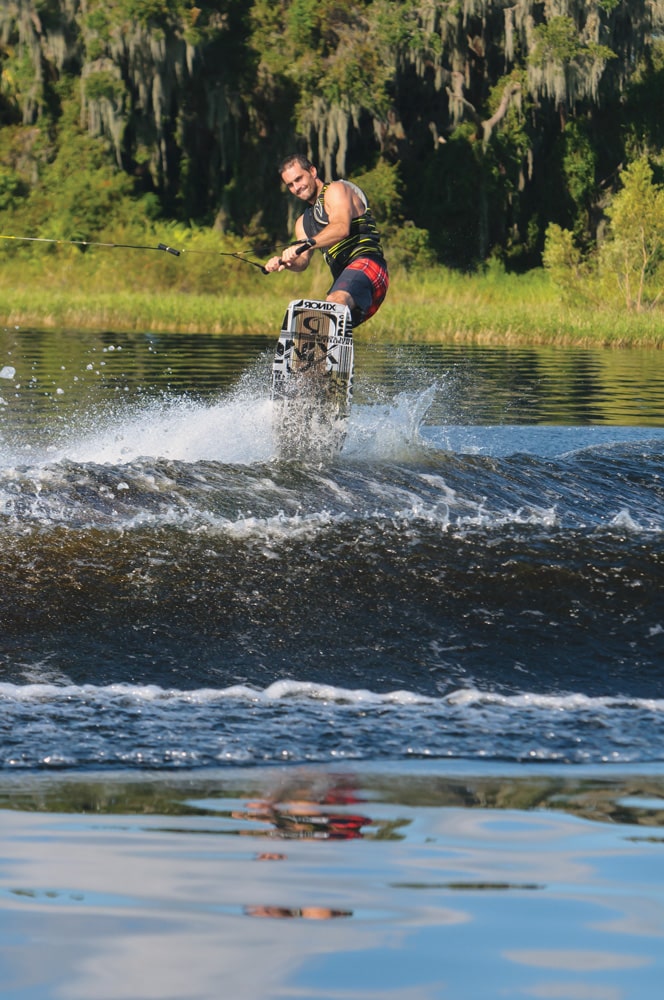
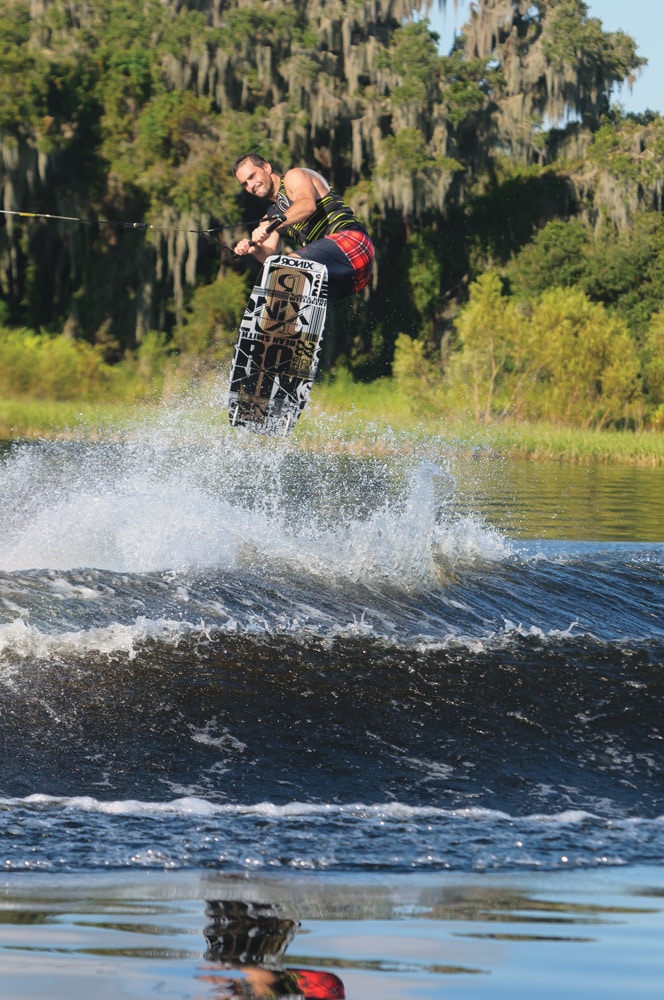
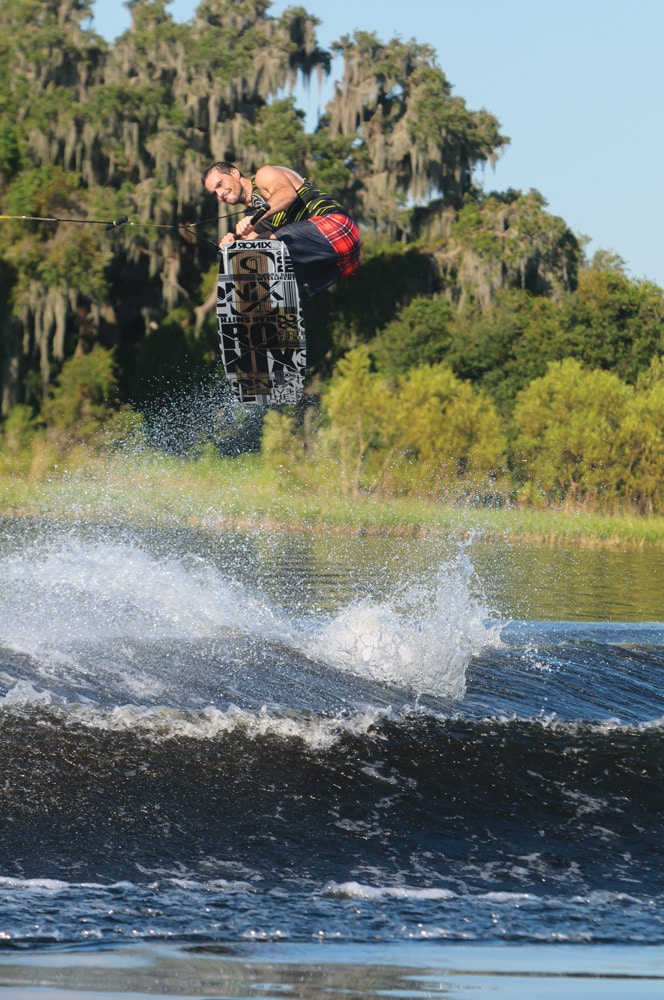
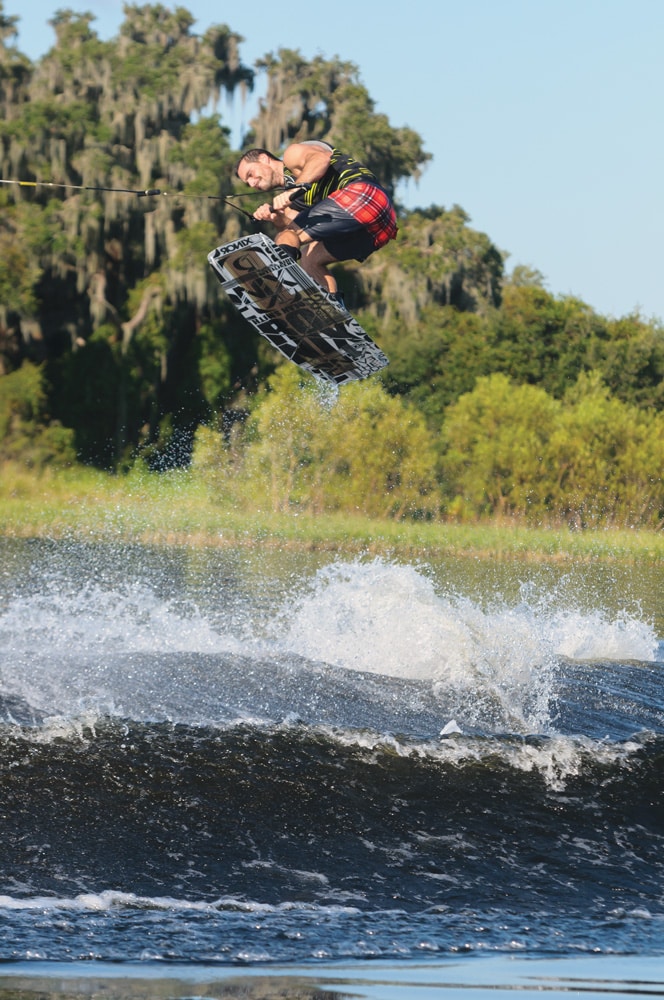
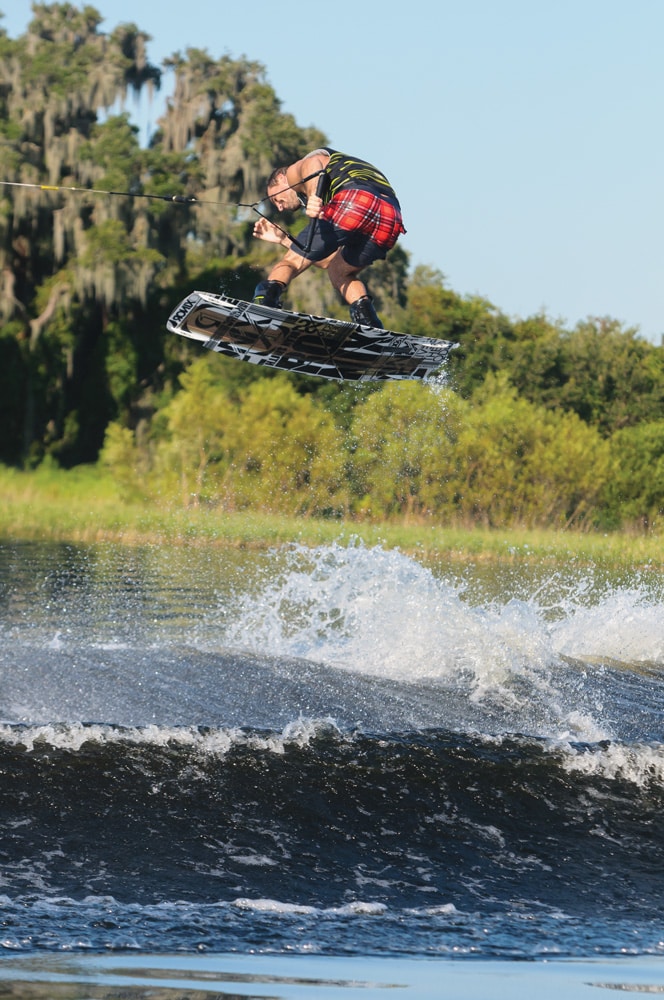
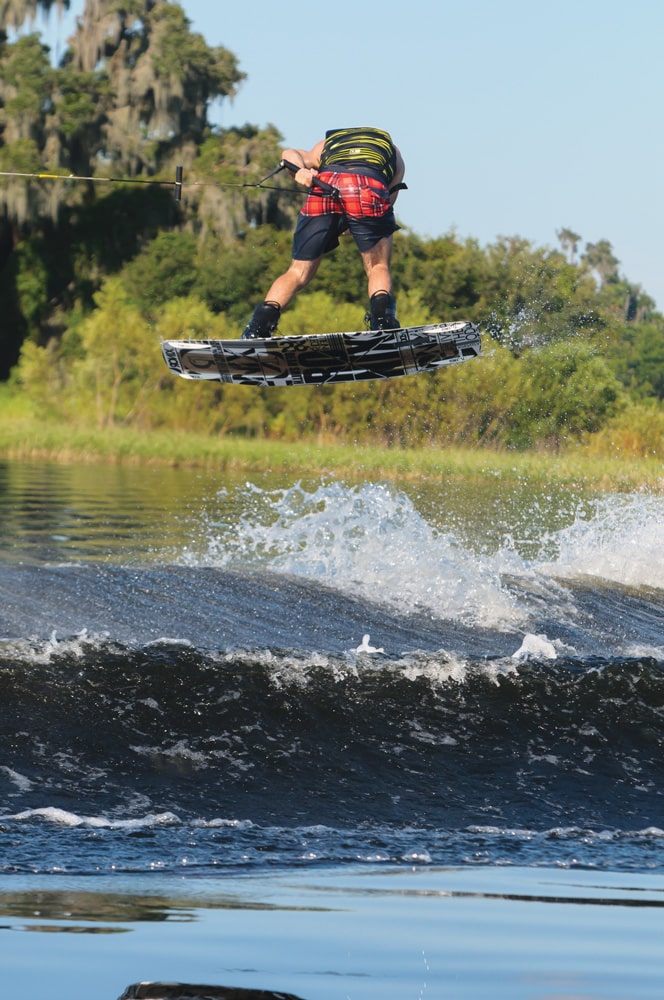
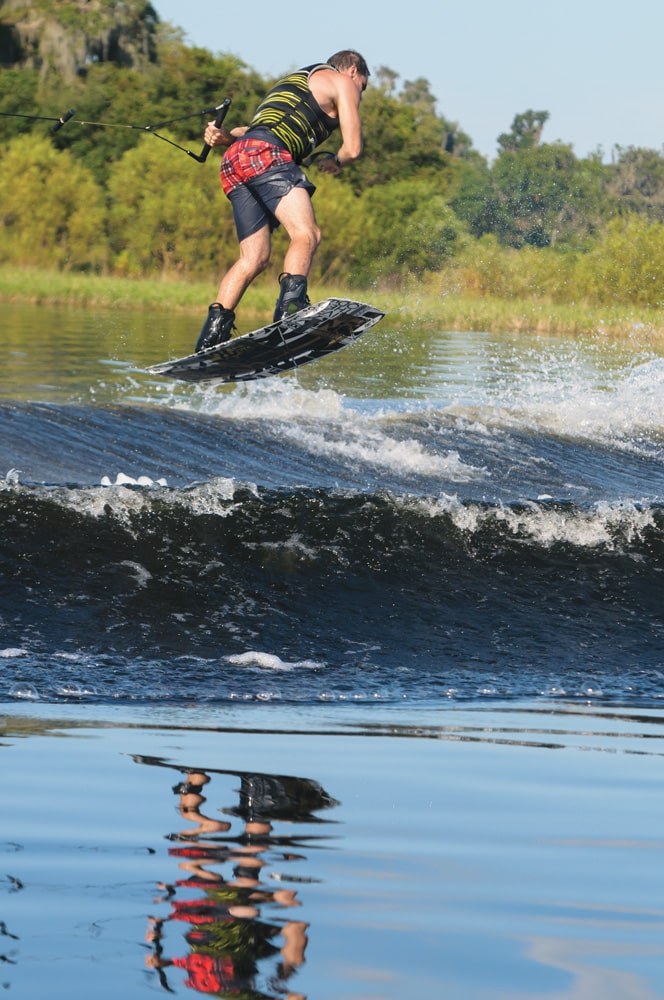
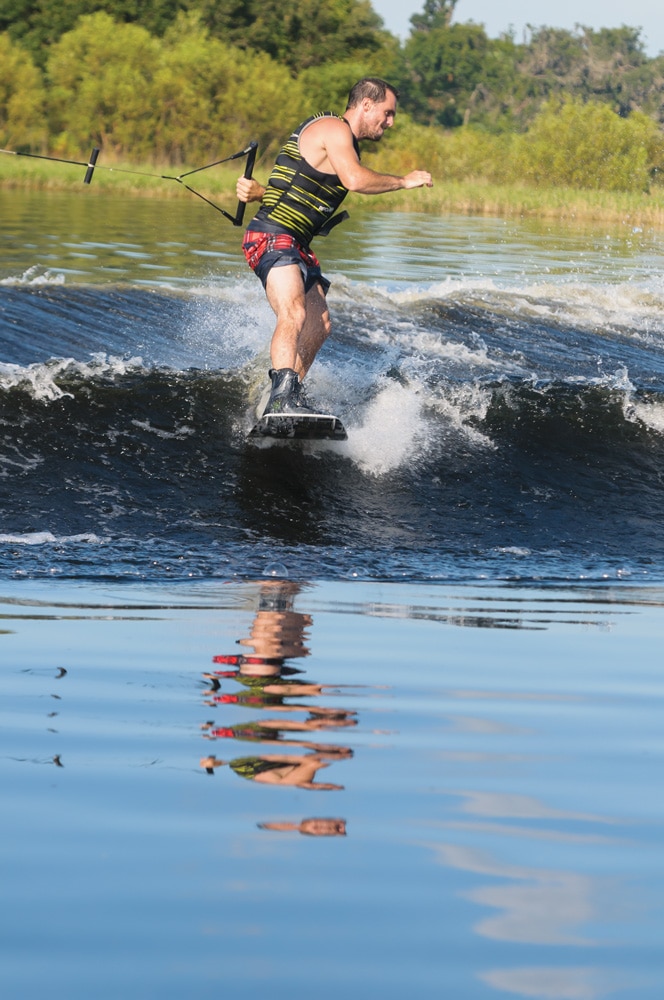
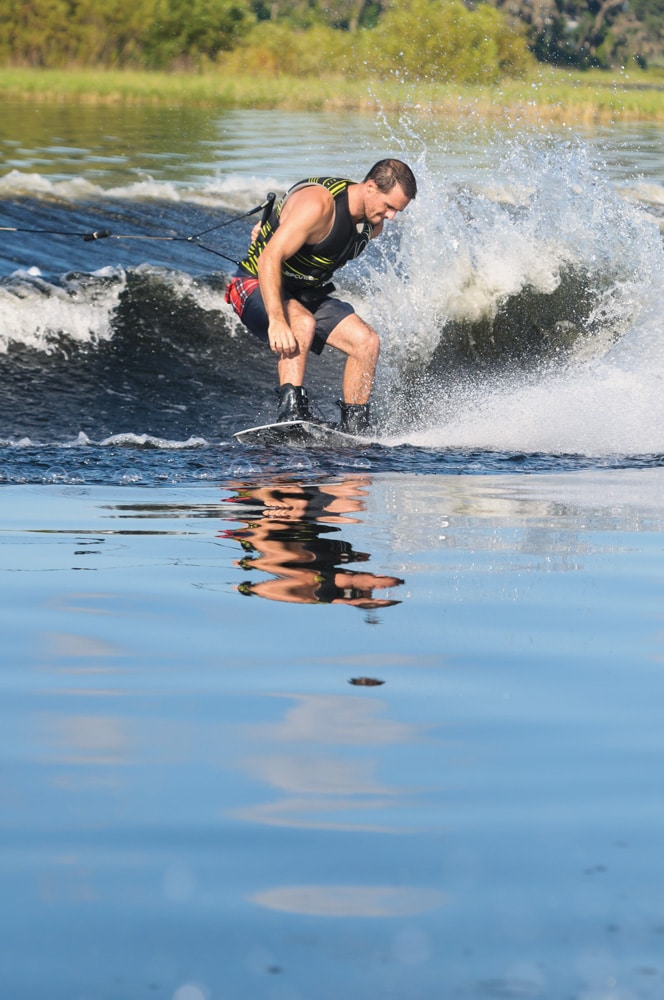
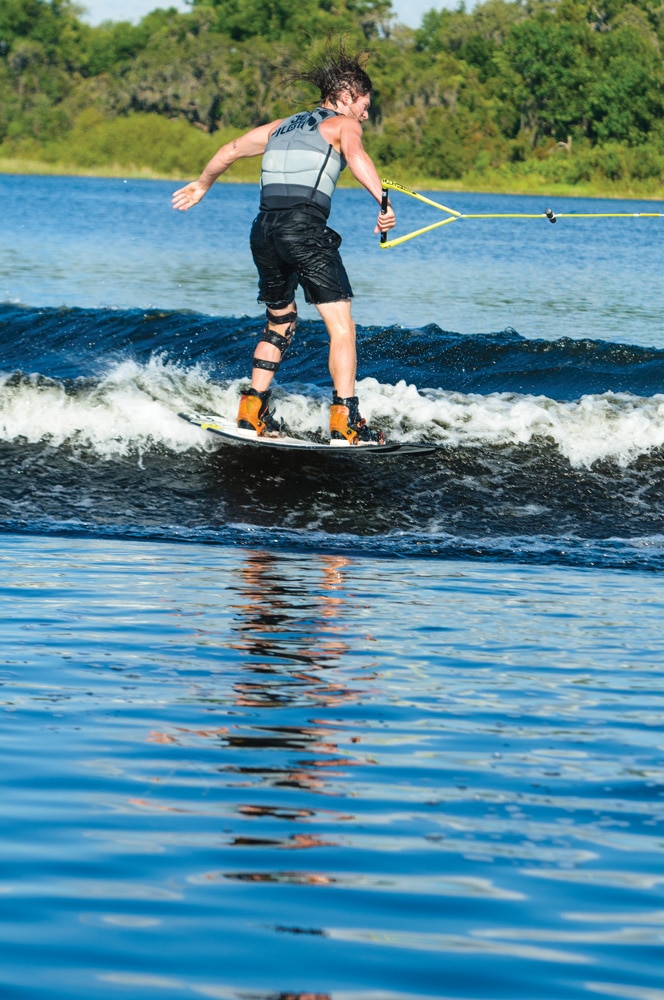
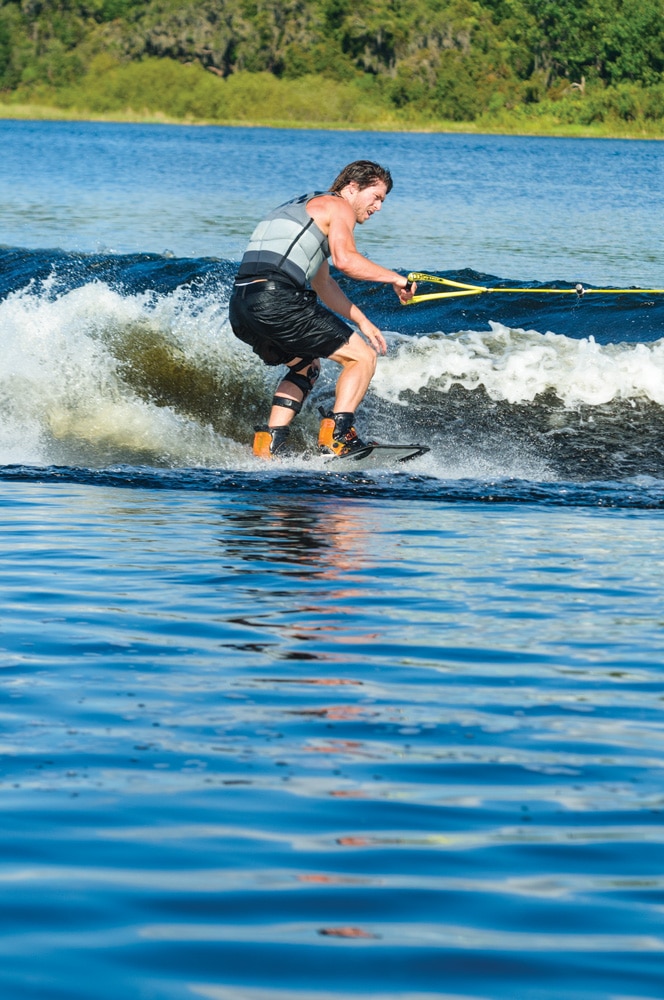
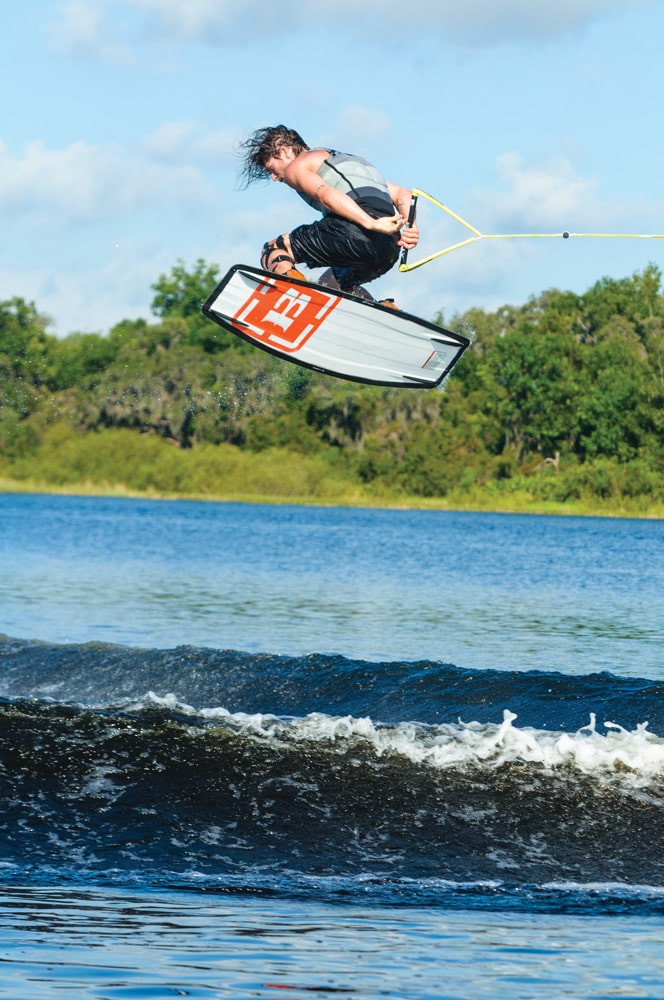
Since the heelside backside 180 is the most common, we’ve looped in Dean Smith to get you started off on the right foot. Keep in mind that there are different ways to land this trick: You can pass the handle before you land (like Dean’s opener), at the point of impact or after you land (see sequence below) — also known as landing blind. For maximum application and consistency, be sure to learn all of these landing positions early on. Due to the brief nature of this instruction, we’ll be focusing primarily on learning how to impact the water before the handle pass, since this blind landing position can be pretty awkward at first.
Now let’s have Dean walk you through the trick, so you can see how our drills fit into the big picture. “The key is to wait to rotate until you are falling out of the trick, after you have reached your peak height. You can do this by spotting your landing on the way up and waiting for some of the tension to come off the line. Once the tension comes off, push the handle into your leading hip to initiate the rotation. As you rotate, keep your eye on your landing so your body knows when to prepare for the landing impact. Land with bent knees, you chest over your toes, and your handle locked into your lower back toward your new leading hip. Once you land, look for the shoreline and continue riding away.”
Overrotation born from fear of catching a back edge is common during the learning process. In order to recognize and trust this landing position with less risk, start in between the wakes at a slow boat speed, twist your lower body into an overturned one-handed backside slide, and keep twisting until you reach the blind position — with your eyes looking forward toward the boat as long as possible. Then, ollie into the blind landing position just a few feet outside the wake, followed by some inside out backside 180s. When you take it wake to wake, start with a shorter rope length — around 50 feet or so. Once consistent, lengthen your rope out a few feet and adjust the speed accordingly. Repeat this until you’ve reached your normal free-ride settings.
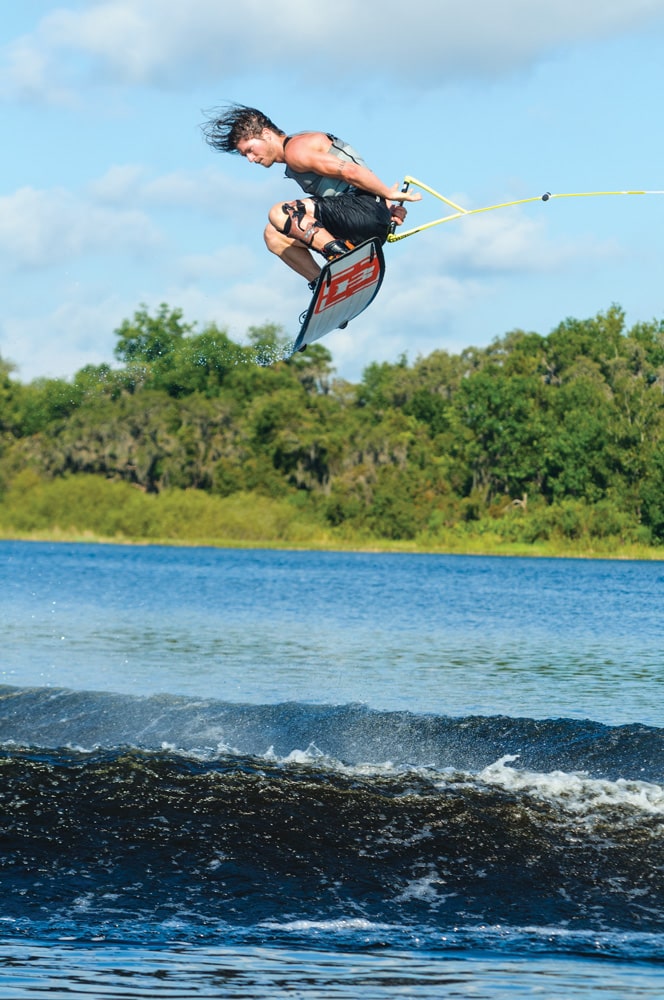
Toeside Backside 180s
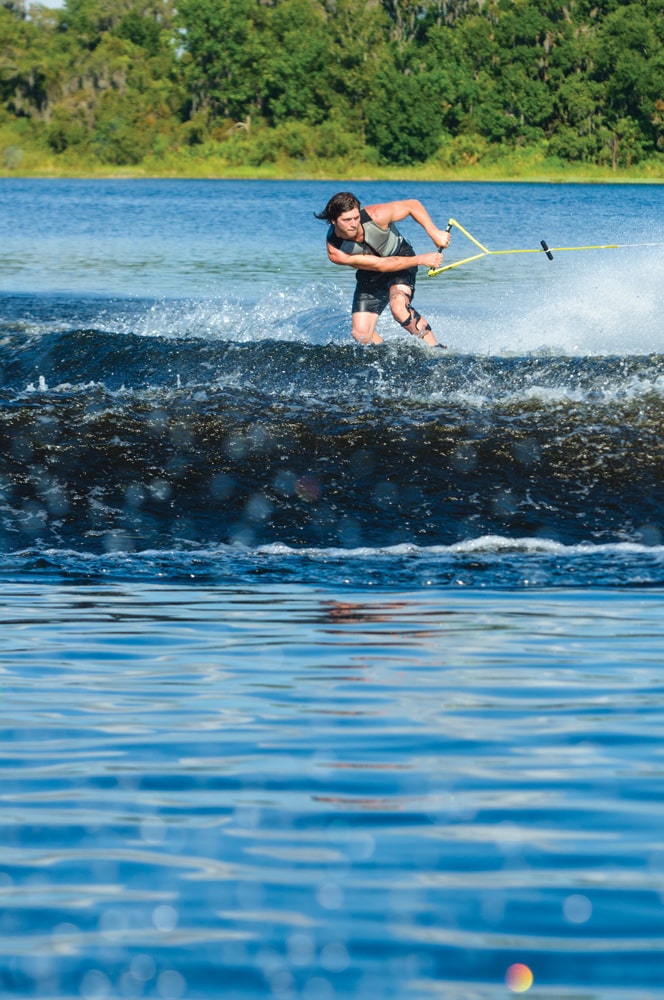
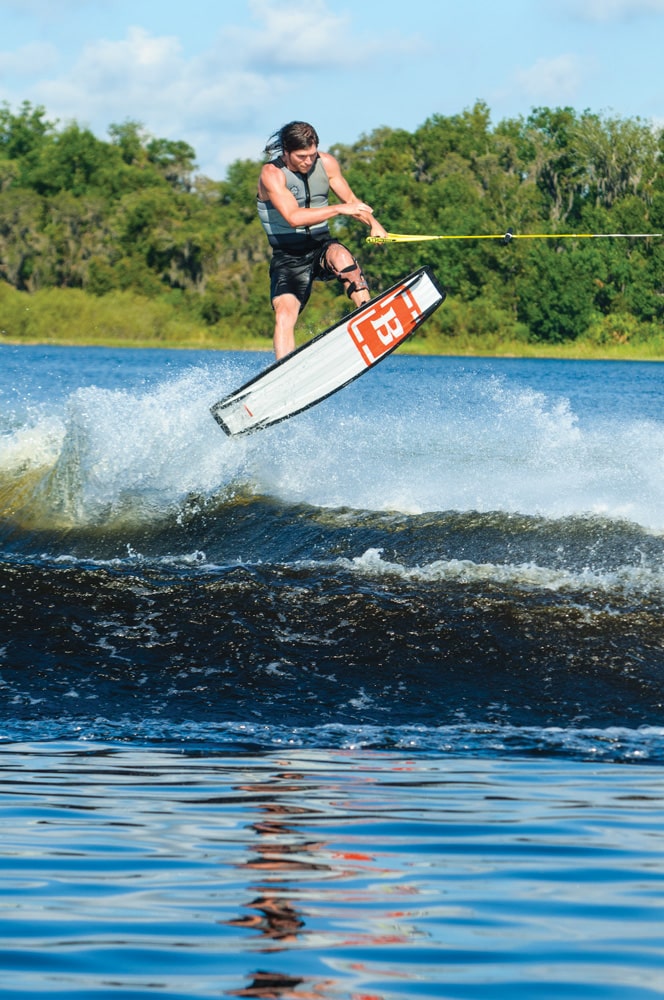
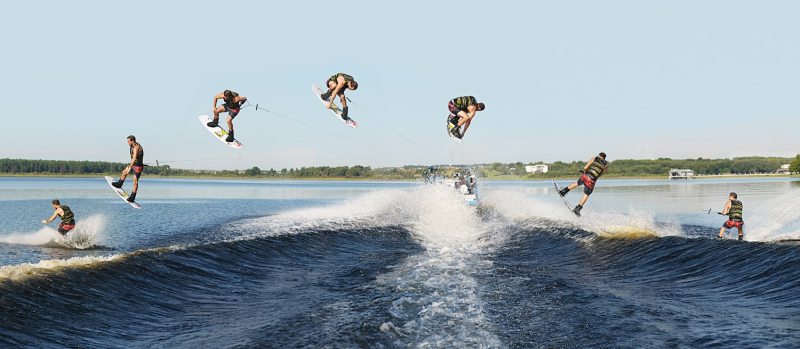
Toeside backside is the most commonly procrastinated spin direction to learn. It makes sense why people put it off, though — it’s toeside, which puts you in a twisted position at takeoff, and then you have to pass the handle without any natural momentum to carry you into the backside rotation. Aaron Rathy says, “The hardest thing about a toeside backside 180 is timing when to go for the handle off the wake. Pulling too early will make you stick to the wake, and pulling too late will make it super hard to pass the handle. That part just takes a bit of time.”
A simple adjustment during your approach can help shorten this learning curve. Let’s look at Rathy’s toeside backside 180, for example. Take a look at the first image in the sequence and compare that to his position as he rides through the top of the wake. Note the dramatic change in the distance between his hips and the handle. This is done by simply allowing some extra distance between your hips and the handle at the start of your approach, and then when you drive your hips forward to stand tall at the wake, whether you realize it or not, you’ve advanced toward the handle. This will free up enough line tension for you to get the handle toward the peak of the trick. Rathy says, “Try not to move the handle too much on the way into the wake, and then when you hit the lip, it’s just a slow pull to your back. Nothing too drastic on this one. A big mistake people make is pulling too hard right away.”
Once you get the handle, the trick should naturally unwind the rest of the 180, so don’t force it. It’s pretty common to overrotate and slip out over your heels at first. To stop your rotation, keep your eyes looking back toward the wake as you land, and they’ll be consistent in no time.
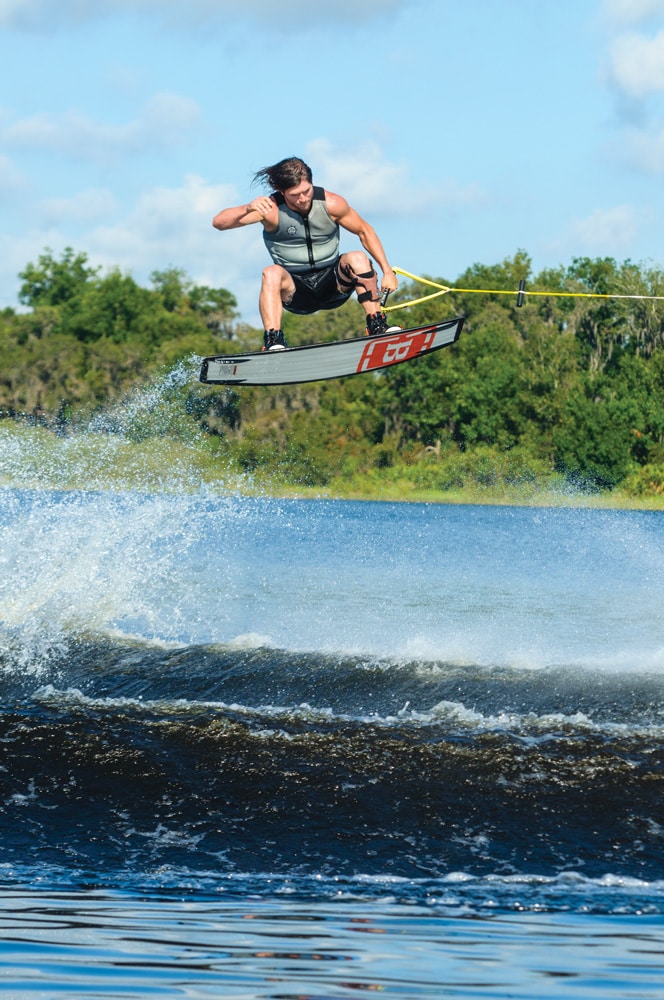
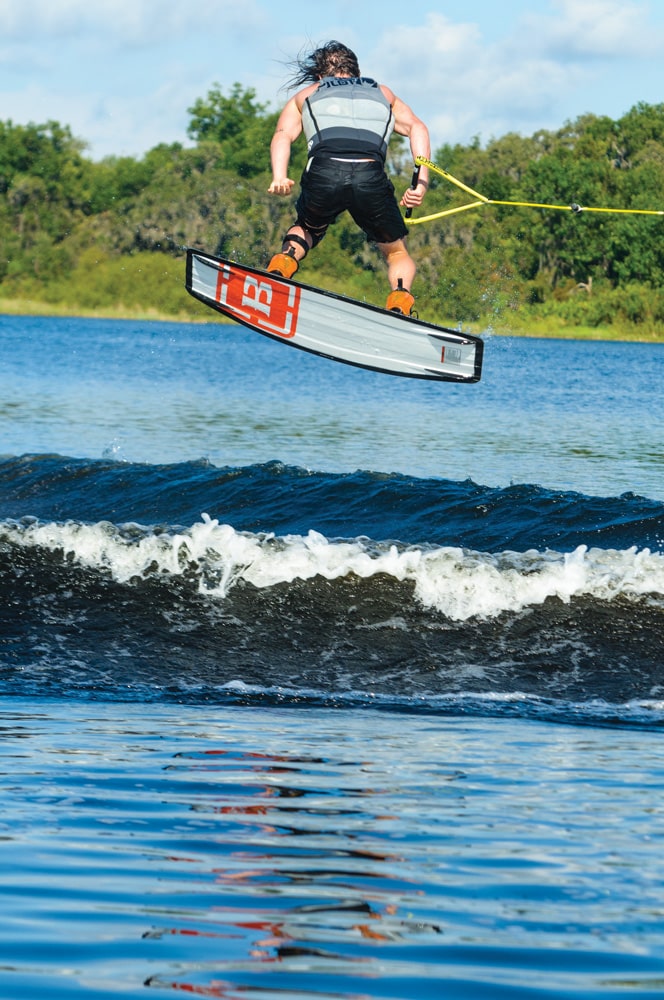
Grab It Like You Mean It
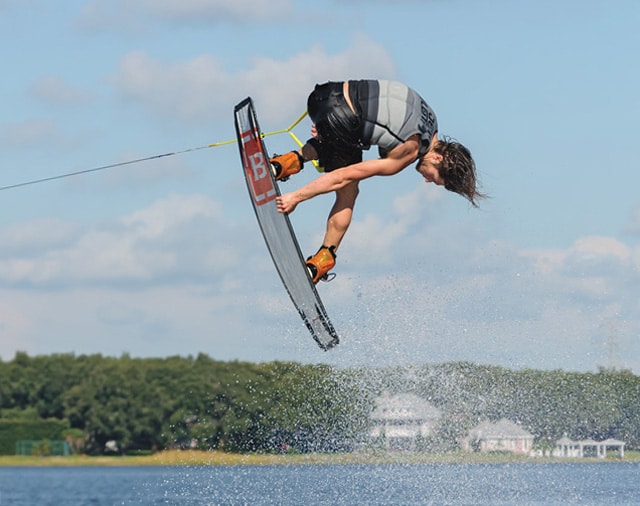
Grabbing backside 180s can be tricky. After all, you can’t pass the handle and grab at the same time, and sometimes the grab can even change the tempo of the trick or throw off your axis if you’re not careful. Done right, however, a good grabbed backside 180 can become one of the most stylish tricks in your repertoire. So spend the time to make it right — it’ll be well worth it.
Before we get started, let’s consider all of the variables at play. When styling out any trick — especially backside 180s — there’s typically a specific, prioritized, midtrick goal position that the rider has in mind. This can be a tempo change, a shifty, a poke or a stalling point that poetically accompanies the grab. Every other aspect of the trick is oriented to support that stylish apex.
There are two main variables to consider when adding grabs to backside 180s. The first is the timing of the handle pass, and the second is the tempo — or the timing of the rotation. Take Dean’s opener on page 70, for example: His indy poked heelside backside 180 apexed right after he finished almost all of his backside rotation. Since it’s incredibly difficult to hold the blind position in the air for that long without being pulled back over your heels, the best solution is to pass the handle on the way down, before the landing impact.
See how it all revolves around the apex moment? Whether or not we are conscious of it, we all have to make those little calculations. To ease yourself into it, start out with the grabs that change your stock backside 180 the least. You’ll offset fewer variables that way. Rathy points out, “For your first few grabbed backside 180s, I’d recommend grabbing before the handle pass with your back hand. Everyone does them a little differently, and as long as you pop it, they are impossible to do wrong. Learn it, give it your own twist, and have fun with it!”