

It’s about time you got out there and learned that 360 you’ve been dreaming about for ages. Luckily for you, we’ve done your homework for you. Check out our 360 instruction from the April issue! Enjoy!
How-To: Learn Your First 360 | Words: Brandon Judd | Photos: Bill Doster
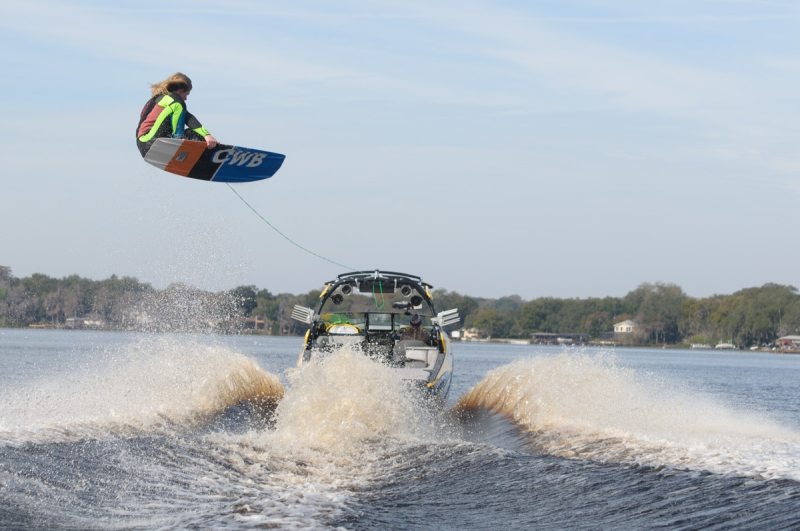
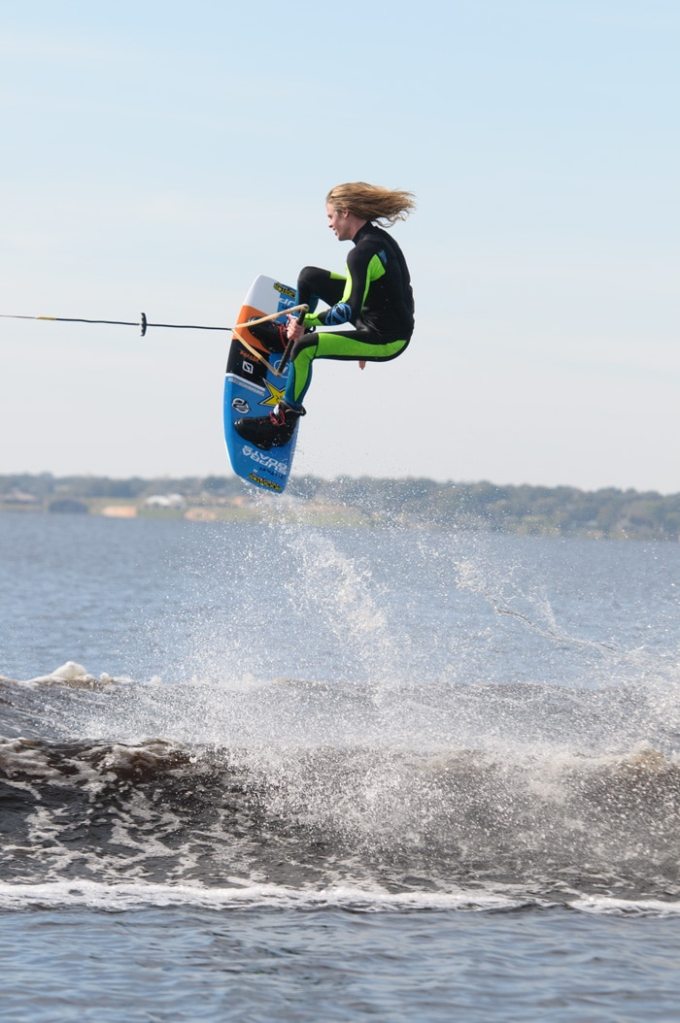
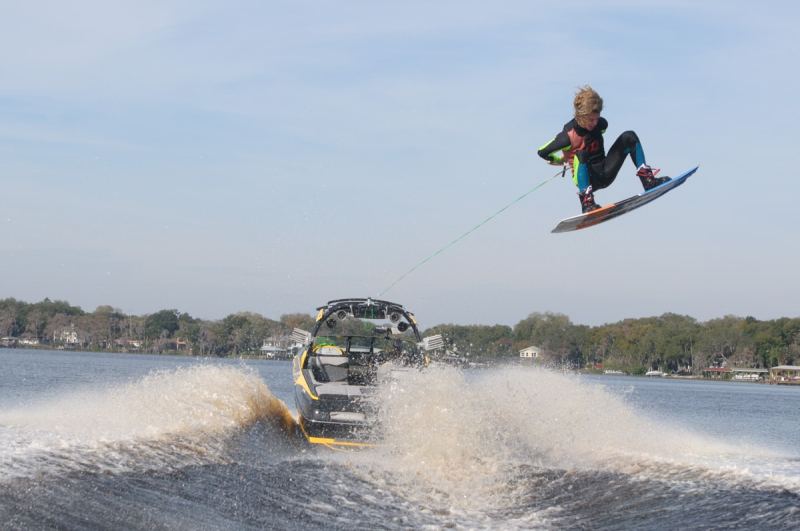
Heelside Frontside 360
This is it. Now is the time. You are going to land your first 360 this year. We all know how much you aspire to add this to your bag of tricks, and we’re committed to helping you get there. But before you go hucking this thing wake to wake at first go, let’s talk a bit about learning in general — specifically, about teaching yourself new tricks.
Getting good takes practice. You often might hear people say, “There’s no substitute for time on the water.” While I’m not saying that this statement is untrue, I will say that it is incomplete. The only real substitute for time on the water is more-effective time on the water. Practice doesn’t make perfect; practice makes permanent. Only perfect practice makes perfect.
So how can you make your time on the water more effective? The key is to pay attention to your comfort zones. Ask yourself, what are you the most comfortable with? And the least? Switch riding, for example, might be horrendously awkward for you. If that’s the case, practice riding switch a little bit every time you ride. You’ll soon discover that, over time, you will chip away at this discomfort and, eventually, it will become so comfortable that you might even forget you’re riding switch.
For your 360, for example, let’s think about all the individual parts of this trick and ask yourself, at what point does your comfort fade into discomfort? Is it the heelside frontside 180? If so, which part specifically? Could it be the switch toeside landing? You get the idea. Be sure to target your weaker points in the trick, and make sure you can do them individually at slower speeds or even sliding on the surface. Coming into this prepared will make the 360 learning curve significantly shorter.

It’s All in the Hips
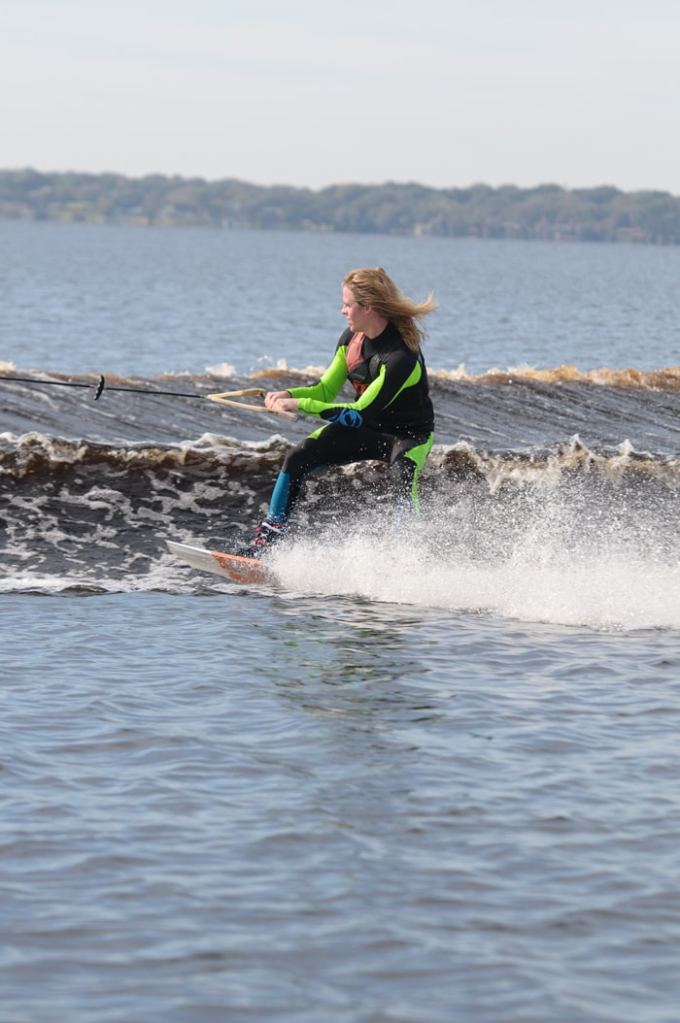
One of the greatest barriers between you and your 360 is the handle pass. Many riders have a tendency to keep the handle in too close during their approach, which forces them to let the handle out a bit at the wake. So, if the distance between your hips and the handle is increasing then, whether you realize it or not, you are actually traveling away from the boat, resulting in an increase in line tension in the air — making the handle pass even more elusive.
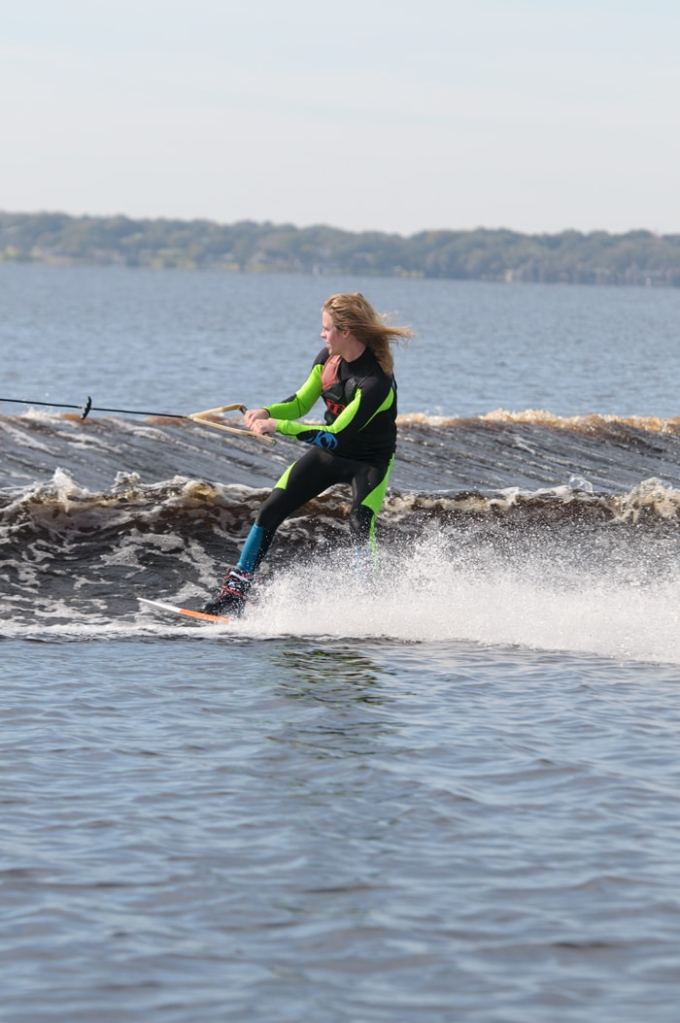
As complex as the problem might sound, the solution is simple. Daniel Powers says, “When approaching the wake, allow the handle to drift out away from your hips — not too much to lose control — but just enough to leave room to advance back in and initiate your rotation.” Sounds easy, right? Well, it actually is — if you trust it. Let’s take another step back and talk physics here. Look at the first three photos in the sequence of Daniel’s approach, and note how the distance between his hips and the handle decreases as he stands tall at the wake. Since the distance between the handle and the boat is a constant, his hips are actually advancing toward the boat at takeoff. This part should happen subconsciously. “When I reach the wake, I just think about standing tall. I don’t really think about where my hips are at all,” says Daniel.
This change in body position, from seated to tall, naturally advances you toward the handle without having to actually pull with your arms. All you have to do is let the handle out during the approach, stand tall at the wake, and the line tension should ease up enough for you to comfortably reach the handle in the air.
Click to view the images below:
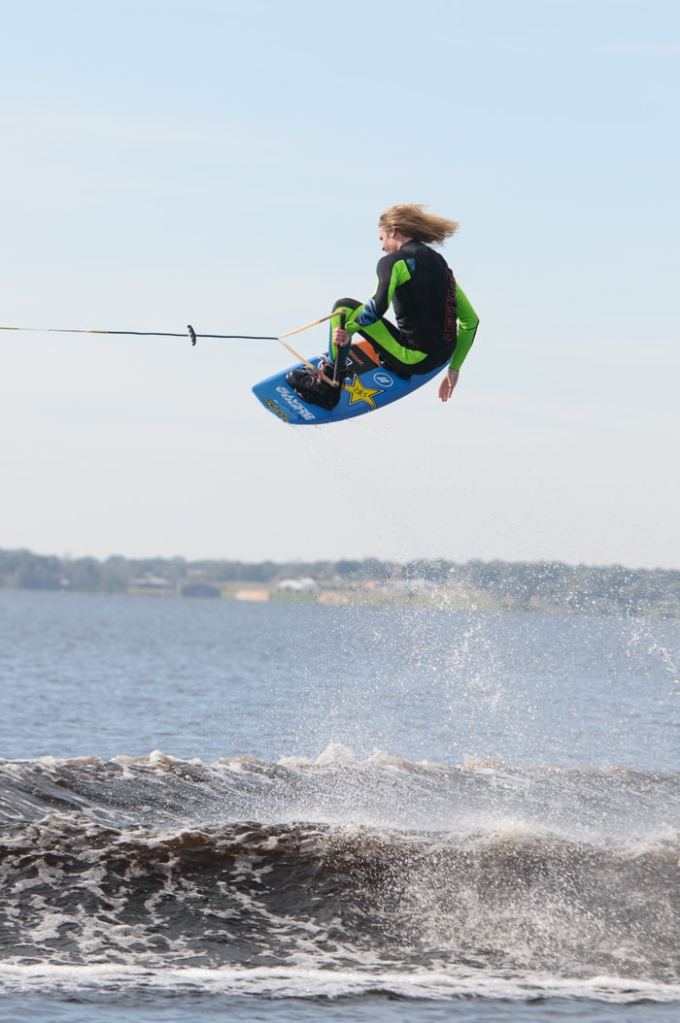
Field of View
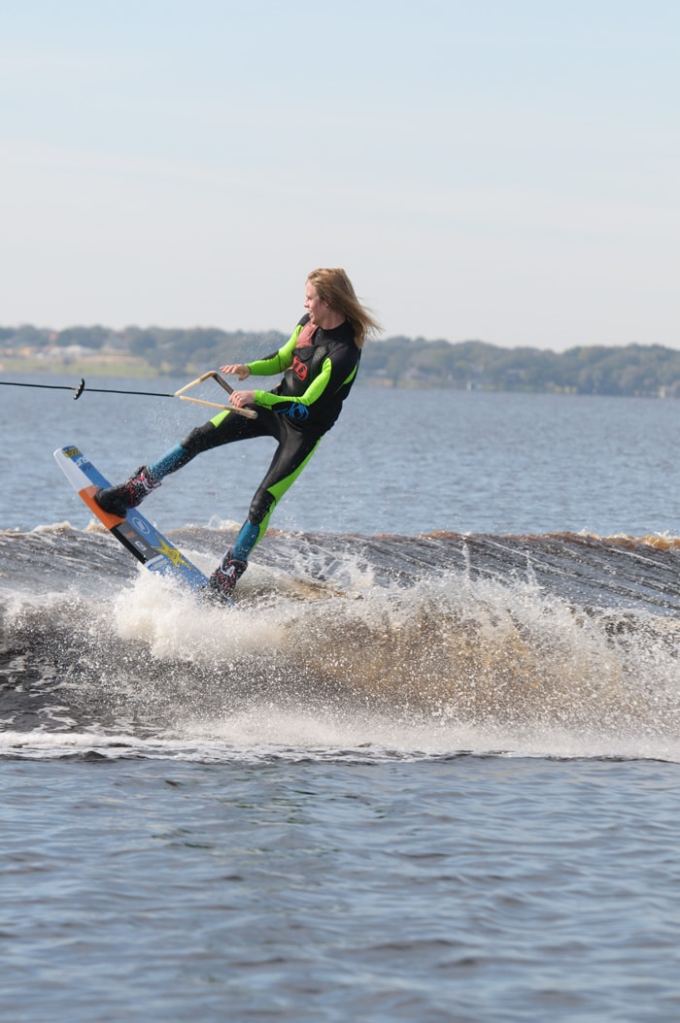
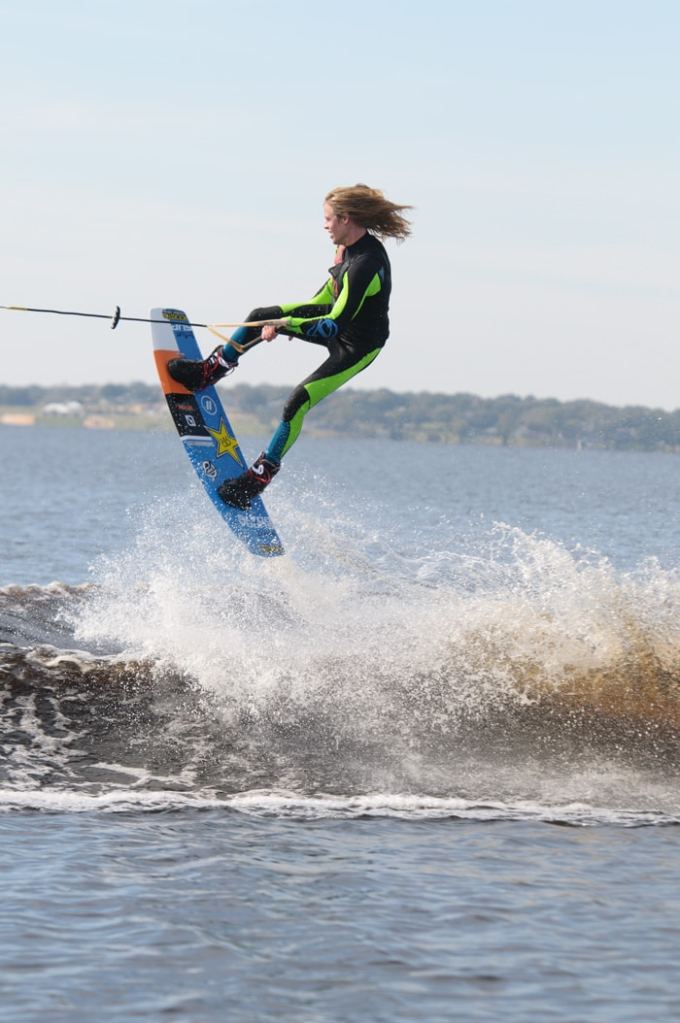
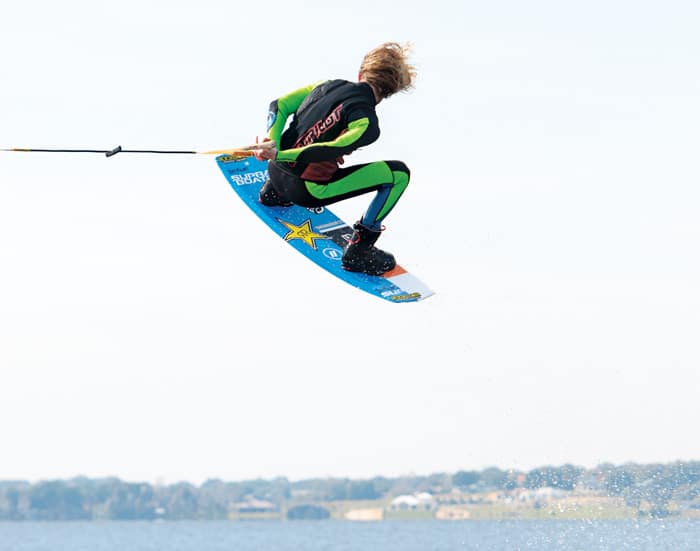
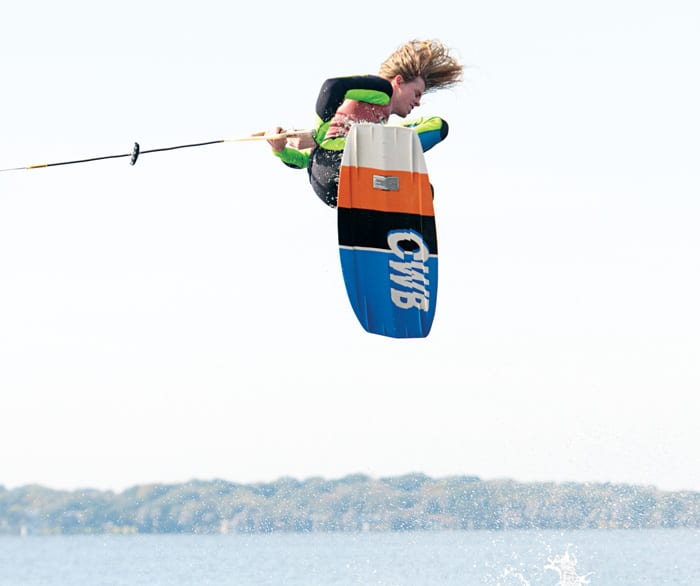
Your successful execution of this trick greatly depends on your comfort in the cuffed position. The term “cuffed” refers to the position you are in when both hands are on the handle behind your back. It’s a similar position to being handcuffed — hence the name.
While cuffed, your field of view will exclude the boat, forcing you to deal with some unfamiliar visual references at your 6 o’clock, and leave you feeling prone to a back edge. And since none of us like back edges, this first 360 can become more about making it past the 270-degree mark alive than even landing the trick. As a result, riders tend to either start spinning too early or they overrotate and slip out over their heels.
Daniel says: “Over-rotation is really common in learning 360s because it is usually the first time the rider will ever turn their back to the boat. To keep from over-rotating, avoid looking back at the boat when you land. Instead, try to keep looking at your landing spot, at the wake, or at the shoreline — whatever works best for you. This is where the drills help out a lot. They can be disorienting at first, but don’t worry, you’ll get used to it.”
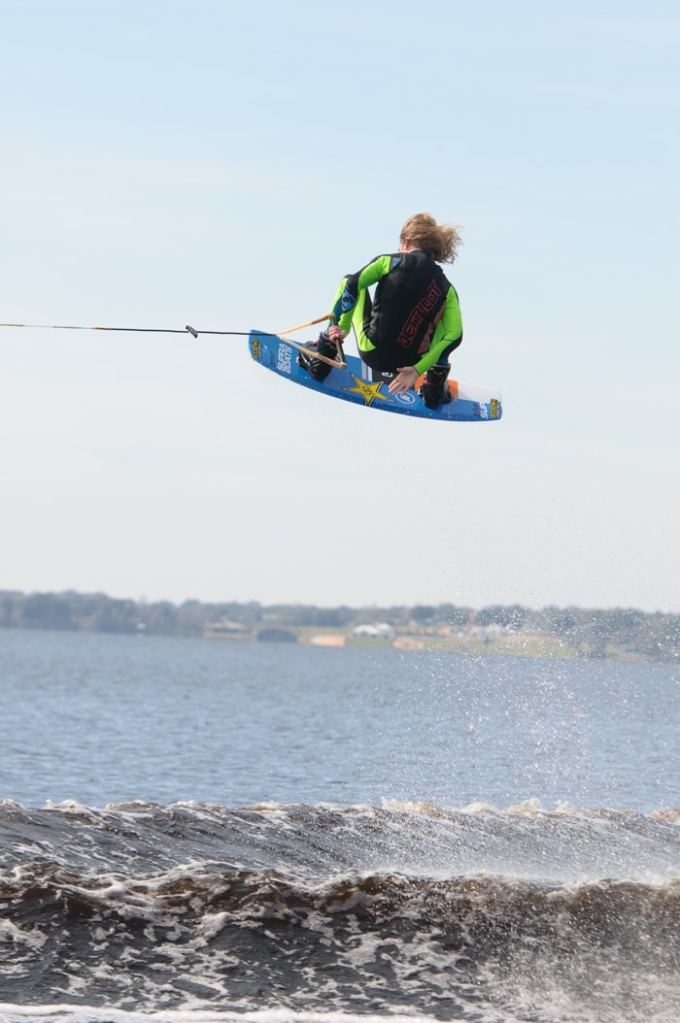
Try a few drills to build your awareness in this landing position as needed. Remember, you can create drills for yourself by pinpointing your weak points that are highlighted by your discomfort. For example, if you can’t handle a landing impact while looking back, start by just riding straight and looking backward for a bit. Then try a few ollies where you land looking back, followed by some inside out, and one-wake jumps in the same fashion.
Eventually, you’ll be able to do a wake jump where you are looking forward on the way up, and then looking back at the wakes as you land. This impact position will transition over nicely to your 360 attempts and keep you from overrotating.
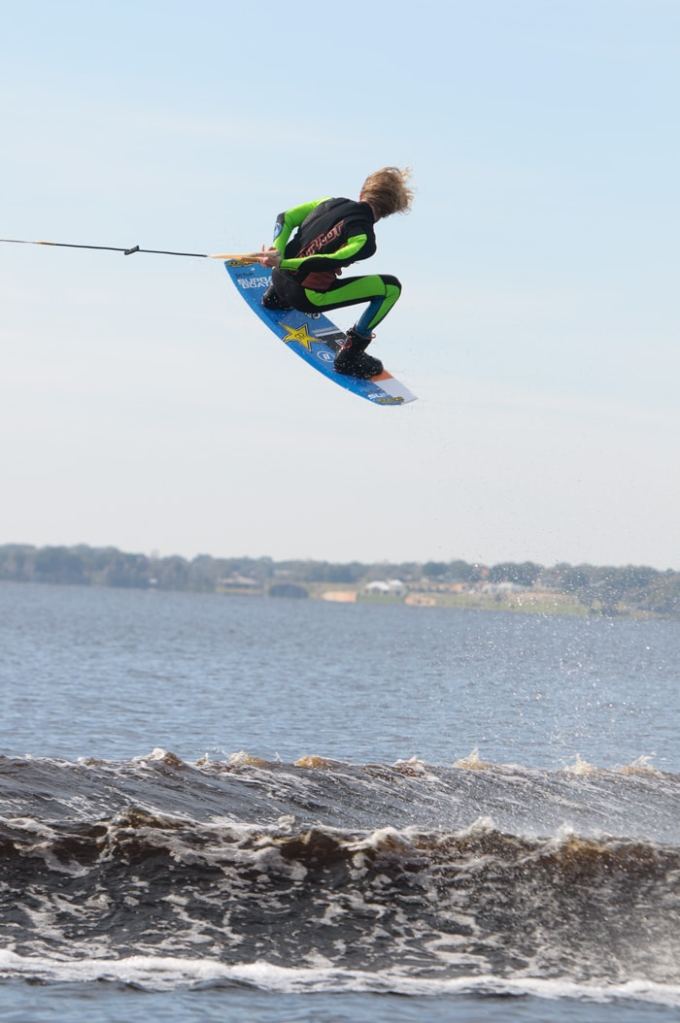
Switch Toeside Backside 180
Have you ever thought about the guts of a heelside frontside 360? We designate spin names by their takeoff position, initial spin direction, and degrees of rotation. So, cut our 360 in half, and you have two different 180s. The first 180 is obvious — a heelside frontside 180. The second 180 can be a little harder to pin down. Think of the position that you are in when you land the first 180 — switch toeside, right? Then, if you were to keep rotating in the same direction as your first 180, that would make the second 180 a switch toeside backside 180.
This 180 is known for being intimidating, for obvious reasons. So it’s not uncommon to want to avoid it completely. But, as Daniel points out: “Learning this 180 at some level will help you with board control, and especially the landing of the 360. Coming out of both of the tricks are exactly the same.”
If you break it down into smaller bite-size pieces, you can build comfort with the rotation in a lower-risk environment. “For both a heelside frontside 360, and a toeside backside 180, I would recommend learning them first at a slow speed on the surface, and then try them one-wake.” Daniel says. “This minimizes the risk and impact of falling, and allows you to learn body control without getting smoked.”
Again, craft a drill that pinpoints your discomfort, and start chipping away at it. For example, if the cuffed position is a weak point for you, at slower speeds, start out switch stance and get into the cuffed position. Then, without moving your upper body out of the cuffed position, move the board back and forth from switch to regular repeatedly. Then repeat the drill and add some lateral travel to it, mimicking the direction of the switch toeside backside 180. From there, add an ollie, then inside out, then one-wake, and so on.
Armed with all of this knowledge, your first 360 should no longer be out of reach. Have at it, folks!
Click to view the images below:


