

I see a lot of campers at The Boarding School who have a handful of heelside inverts on lock but can’t even jump the wake toeside. I get it — it’s awkward to cut and get air toeside. The rope’s pull is constantly working to open your upper body to the boat, which makes it hard to continue going where you want to go. Put the effort into your toeside riding, however, and you can totally change the sport for yourself. Not only will it make you a more balanced rider, but it’ll expand your bag of tricks as well. Work on your toeside technique this summer and you’ll unlock everything from toeside 180s and 360s to tricks like switch heelside 180s that require toeside landings. In this wakeboard how to, I’ll show you the proper toeside body position as well as a one-wake drill that will have you riding toeside like a pro in no time. — Shaun Murray
Proper Toeside Position
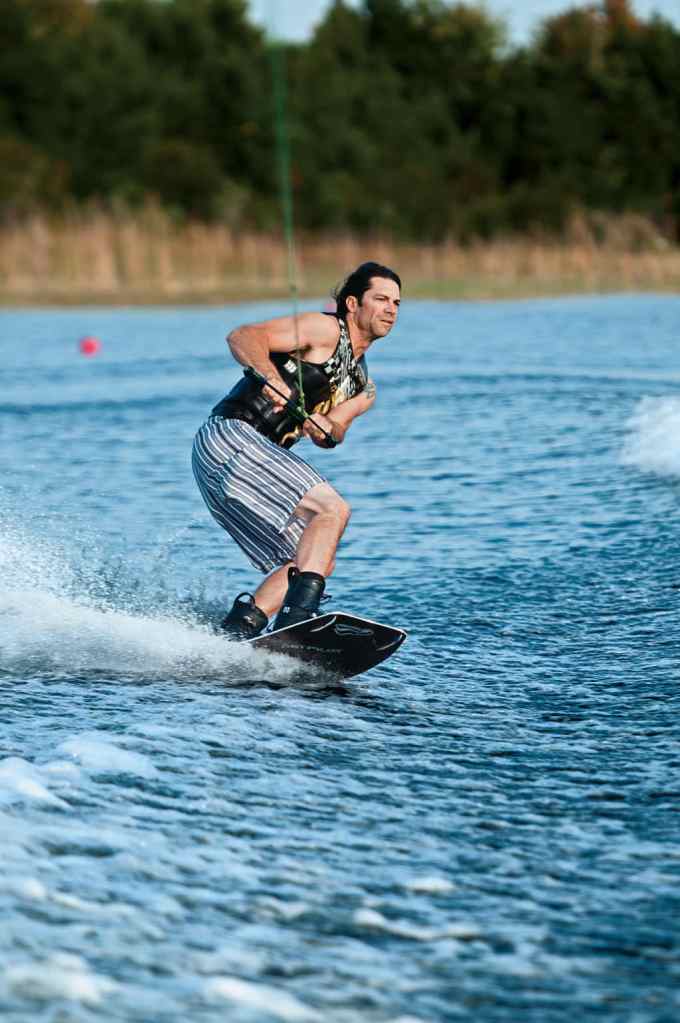
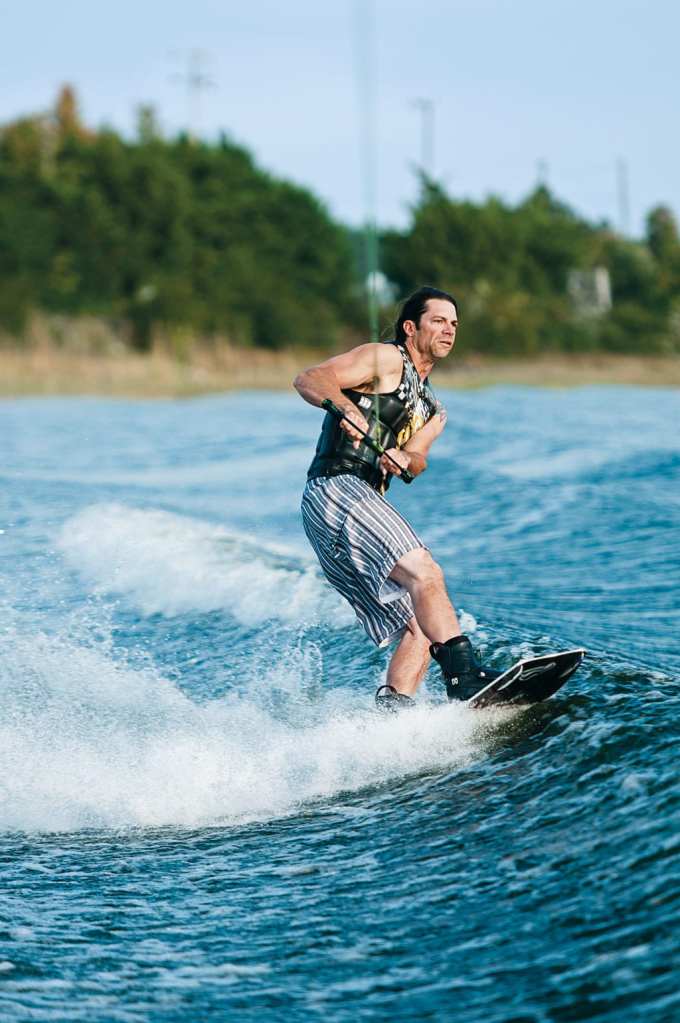
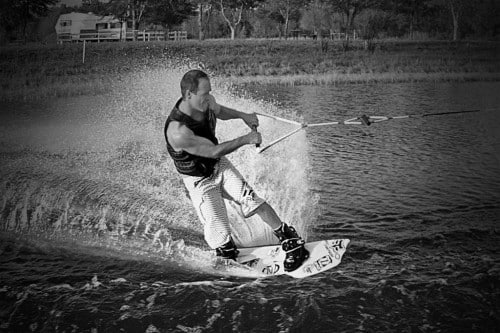
Great toeside tricks start with proper position.
— Stand tall with your chest up, arms mostly straight and relaxed and hips close to the handle.
— Push the handle down toward your front hip to keep the pull centered on your body.
— Never let the handle move too high. The pull will shift to your upper body and pull you out the front.
— Ninety-five percent of the pull should be in your back arm. You have it right when your back bicep is pressed against your back pectoral.
The Drill
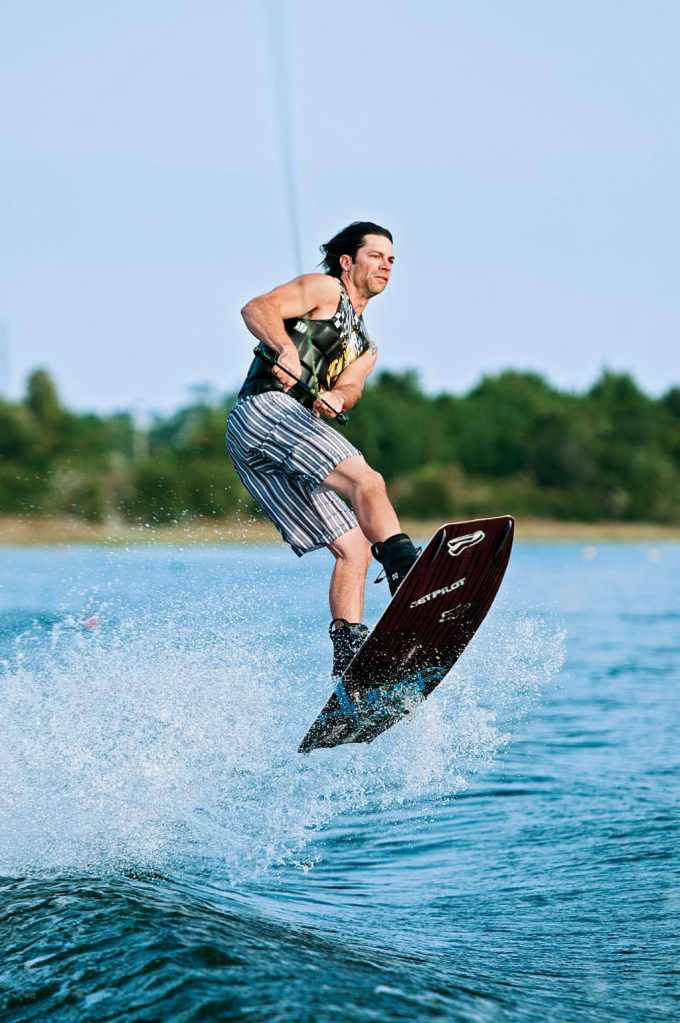
Dial in your toeside technique with this one-wake exercise.
Sure, heelside is easier. Just fall back against the rope and you’re on your way. What a lot of riders don’t realize, however, is that 99 percent of you have perfect toeside body position when you cut away from the wake in preparation for a heelside jump. The foundation is there; now fine-tune it. Whether heelside or toeside, a successful wake jump is about maintaining direction and momentum at all times.
Set up. Slow the boat down to about 18 to 20 mph and let the rope out to at least 70 feet, creating a big landing area. Start with one-wake jumps from a short approach — about 5 to 8 feet from the wake. Use a progressive edge into the wake. Start with a very easy edge, then gradually increase your angle into the wake while increasing how hard you’re edging. Remember, your back arm should receive almost all the pull from the boat, so focus on your front hand keeping the handle down.
Use both hands. When you pop at the wake, the pop transfers into the handle, which feels like you’re going to get pulled out the front. Keep the handle low with both hands, however, and it will pull you up and across. As a result, keep two hands on the handle through the wake and at least to your jump’s peak.
Less is best. Don’t try to pop at the wake by standing up. Mistiming will creep in and cause problems. Instead, do nothing. Simply stand tall and wait for your edge to push you into the air.
Look where you want to go. Don’t look where you think you’re going to fall. Focus your eyes about 10 feet ahead at all times.
Keep your upper body very still. This helps maintain direction and momentum when you land. The force of the impact has to go somewhere, of course, but your knees absorbing the landing should be your body’s only movement.
Get consistent. When you land, continue over the second wake and focus on maintaining your speed and direction until you’re 10 feet past it. Repeat until you’re keeping your body still, your speed constant and your landings solid.
Go further. Gradually lengthen your approach 5 feet at a time until you’re about 20 feet from the toeside wake. Even with an aggressive cut, you shouldn’t have to deal with the second wake right away. If you’re landing too close to the second wake, let out the rope, slow down the boat or both.
Take it wake to wake. Once you feel comfortable with one-wake jumps, shorten to your normal length and go back up to typical riding speed. Make sure to commit to a good, hard edge and not just a little tester.
What’s next? When your toeside wake jump is dialed, go for the 180. You’ll find it’s an easier landing than a heelside 180 because you’ll land leaning against the rope. From there, work on switch wake-to-wake airs, which will lead to a switch 180.


